
Pranav RameshAvid programmer, expert in robot design and programming Strategy is extremely important when tackling the Robot Game in FIRST Lego League. You want to complete as many missions as your robot is capable of, while optimizing for the 2:30 minutes that you have to run your robot. So what are the best practices when deciding your missions? 1. Choose the missions that help you get more points and require simple designs to accomplish. In a given FLL season, there will be around 13 to 16 missions. Missions vary in point values, and typically, difficult missions grant more points and require further innovation in your attachments. If you can create simple attachments that can accomplish these missions, and they grant you more points, then they are the ones that you should most probably pursue. In addition, if these missions can be accomplished with passive mechanisms (no automation) rather than active mechanisms (need motors), then that's more beneficial because it allows you to use your attachment-operating motors to adhere to other missions that require active mechanisms. 2. Group missions by region. To understand this concept, let's take the 2017-2018 Hydrodynamics robot game. 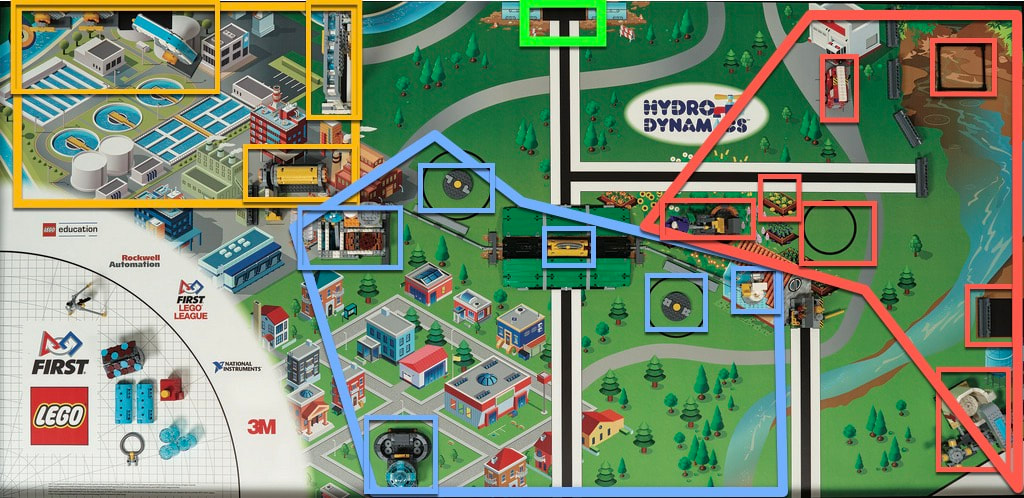 We can see that there are a lot of missions on this board. We can best optimize our time by accomplishing multiple missions in a single run (a run is defined as the period of time between when the robot leaves the base at any point in time and returns to the base before going out again). Now, let's take this same board, but this time, we will group missions that are close in proximity. 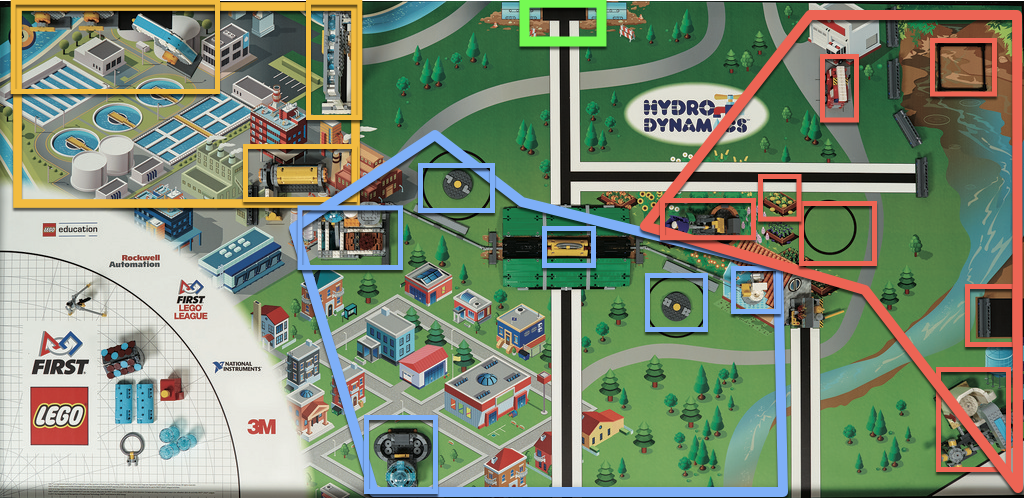 We have divided the board up into four sections: Northwest (yellow), South-Middle (blue), East (red), and North-Middle (green). These sections represent an optimal amount of robot runs that your robot can make during a match. The more missions you can complete in a run, the better. Once you divide your game missions into groups, you need to figure out how to tackle each mission in a group. Start by analyzing which missions can easily be performed using passive attachments, and if there are no quick and simple ways to accomplish the missions using passive mechanisms, you can resort to active mechanisms. It is important to acknowledge, however, that you can and should attempt to use an active or passive mechanism multiple times for various missions in a group, because that saves space on your robot.
Sidharth MasarurCompetition Tip Provider, Avid EV3 Programmer and Fan! So you've completed your first FLL "build season", and your competition is tomorrow. First of all, congratulations!! You've made it this far, and your competitions will be the best experience of your whole FLL experience. Let's talk about the aspects of the competition, and what will make it great, as well as what to expect. Robot GameAt regional events, you will have 5 robot runs to earn as many points as possible. At state competitions, you will have 3 chances. Make sure to arrive at least 5 minutes ahead of schedule to your matches, and only have 2 robot drivers enter near the playing field. Pay attention to the signs and directions, as many competitions like to stay organized in how they line up teams. Next, make sure you bring a cart or stand to carry your attachments for your robot so that you don't have to reach for the floor each time. It's important to save as much time as possible. When the Hydrabots (us) were competing, we had a rolling cart to carry our attachments, with one person in charge of putting on attachments, while another would align and reset the robot to the correct program. This made it very effective for us, and allowed us to place in the top 4 at our regionals event, and our state championship as well, contributing to our 2nd place standing in the state of Connecticut. 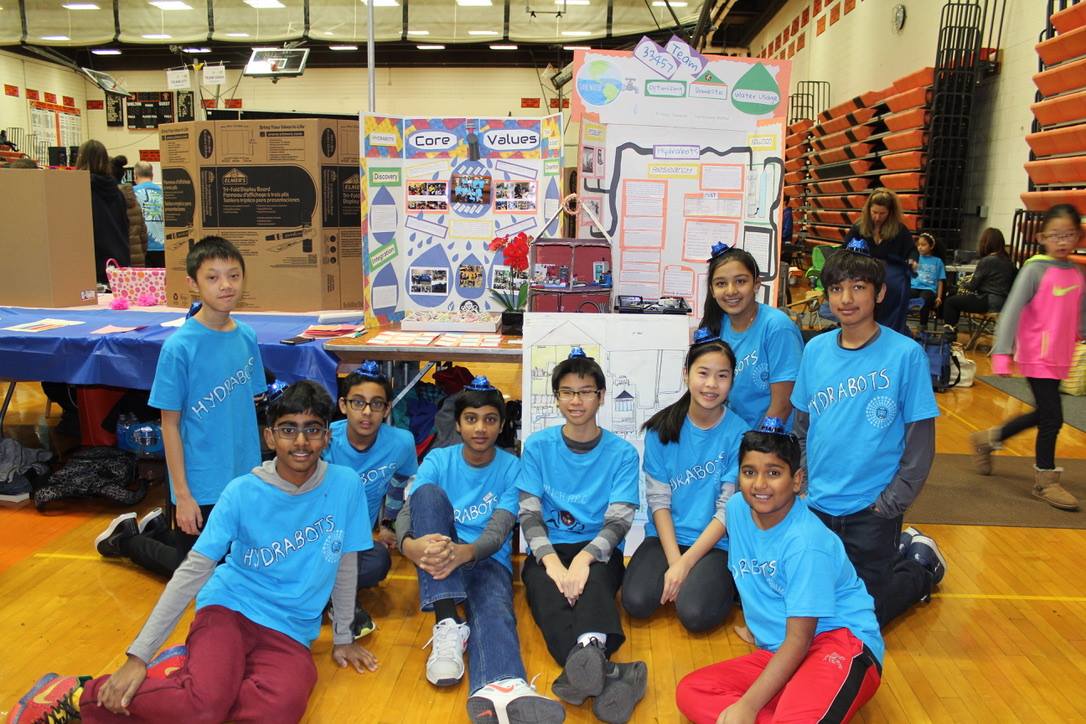 JudgingJudging will be a great, but very stressful experience. In all your judging rooms, you will have a maximum of 10 minutes to present and have judges ask questions. Make sure to introduce yourself to the judges, and treat them with respect. After all, they're the ones who determine if you get points or not (No pressure :)). Also, don't sound too scripted. Feel free to edit what you have practiced, so it isn't word for word, but it should have some relation to the structure with which you've practiced. Make sure to practice with confidence. After all, you should practice how you play, so you can play how you practiced! Finally, make sure you stick to the following judging structures, and have the content for them Robot Judging Structure: Depends on the event. Some require presentation, but all will have Q&A session (all events), followed by robot mission demo (depends on event) Tips: - Make sure your code is efficient and readable. Have plenty of comments and notes - EVERYBODY should know about the robot and all the attachments, code, and missions. A great way to do this is to allow everyone to program some parts of the missions, so that everyone is familiar with the software - Create a RDES Binder or notebook, as this is actually very important to have. Make copies for each judge (approx. 2 or 3), and detail all missions, as well as parts and attachments of the robot Project Judging Structure: 5 min. presentation, 5 min. questions Tips: - Practice, practice, practice! It's key to maintain your presentation BELOW the 5 minutes given, because you never know if the judges will cut you off at 5 minutes, or if they will allow you to finish - Know the lines VERY WELL. Someone may make a mistake or forget a line, so you should be ready to pick up where they left off. - Have some cool props and costumes. It could add to the value of the presentation Core Values Structure: 2-3 minute activity, followed by Q&A session with judges Tips: - Make sure to not answer if the judge is looking at another team member. You can add on to their answer by saying, "To add on to..." or "in addition to what (teammate) has said.." - Do not exclude or show rude behavior or attitude to any team members when working on the group activity. Remember, judges are not necessarily looking for you to complete the activity, but they want to see how you work together. - However, this doesn't mean you shouldn't complete the activity. Part of being a great team is completing tasks efficiently and together. So make sure to take note of the task, while also being cooperative - Finally, make sure to have fun!! DO NOT sound scripted. Show the judges that you're actually a great working team, because we know you are! Another tip: It doesn't hurt to say thank you and show respect to your teammates and judges :) As you can see, competitions are busy places, and you have to do quite a bit to make sure your team has a chance for success. However, no matter how you perform, competitions are the BEST places in your FLL experience, and make sure you enjoy your time there. We know we did. 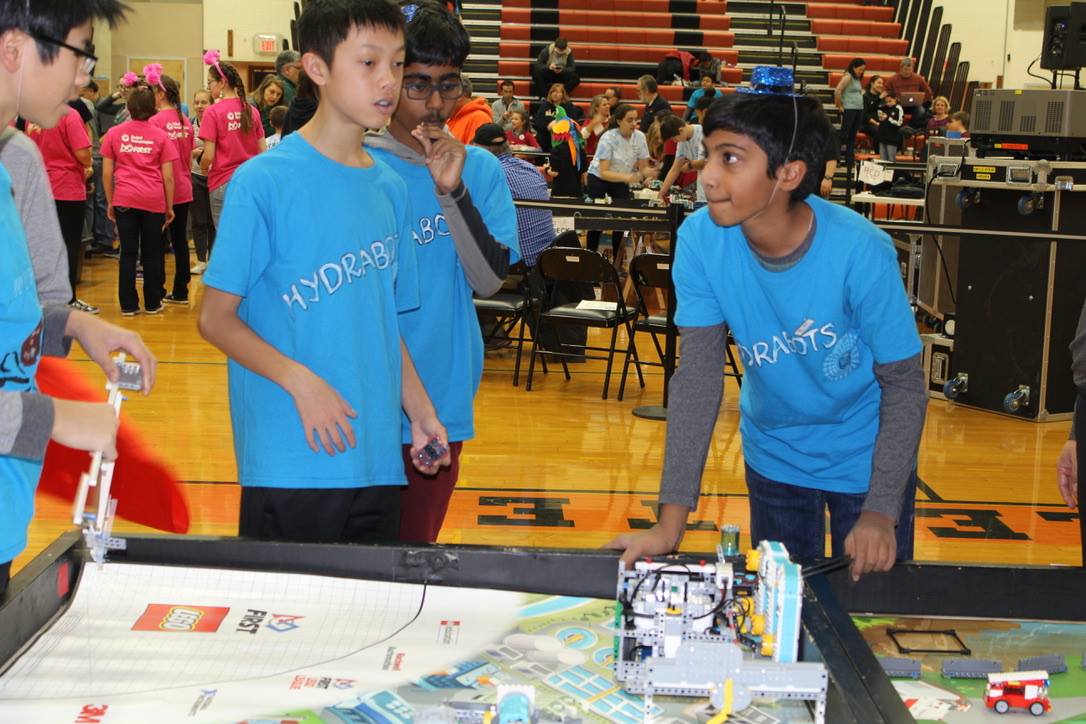 Pranav RameshAvid programmer, expert in robot design and programming Moving your EV3 robot forward is an essential fundamental when programming a robot. We will learn how to do so using the new MicroPython framework. Our left-wheel large motor will be in Port B, and our right-wheel large motor will be in Port C. Let's create a function moveForward(). This function will accomplish our task of moving forward. For our parameters, we can include lm and rm, which represent our two drivetrain motors and allow us to pass motors into our function, angle, which represents the number of degrees the motors should turn before stopping, and speed, which indicates the speed (deg/sec) that the robot should travel. Because our parameter angle indicates the amount of degrees the motor should turn, our code needs to use a loop where the motors keep running until a motor's current angle is displaced from the original motor angle by an amount equal to angle. So, the first thing we must do is assign a variable, original_angle, which represents a motor's angle before the robot moves. We will use the left motor's angle to calculate this. Next, we want to keep moving the robot forward until the lm.angle() minus original_angle is angle. We can create a while loop that does this. In our while loop, we can keep both motors running at the speed indicated by the speed parameter. Finally, once our robot has moved forward the amount of degrees we wanted, we can stop the motors. Let's test our code out. For the lm and rm arguments, enter leftMotor and rightMotor. For the angle parameter, enter any angle, like 360, and for speed, enter any speed, like 100. Remember that the number of degrees your robot will move depends on your wheel diameter. You should find that your robot successfully moved forward for a set number of degrees.
|
SWFLLHere we will post exciting announcements, as well as interesting tips as the FLL Season approaches ArchivesCategories |
 RSS Feed
